IoT Kits
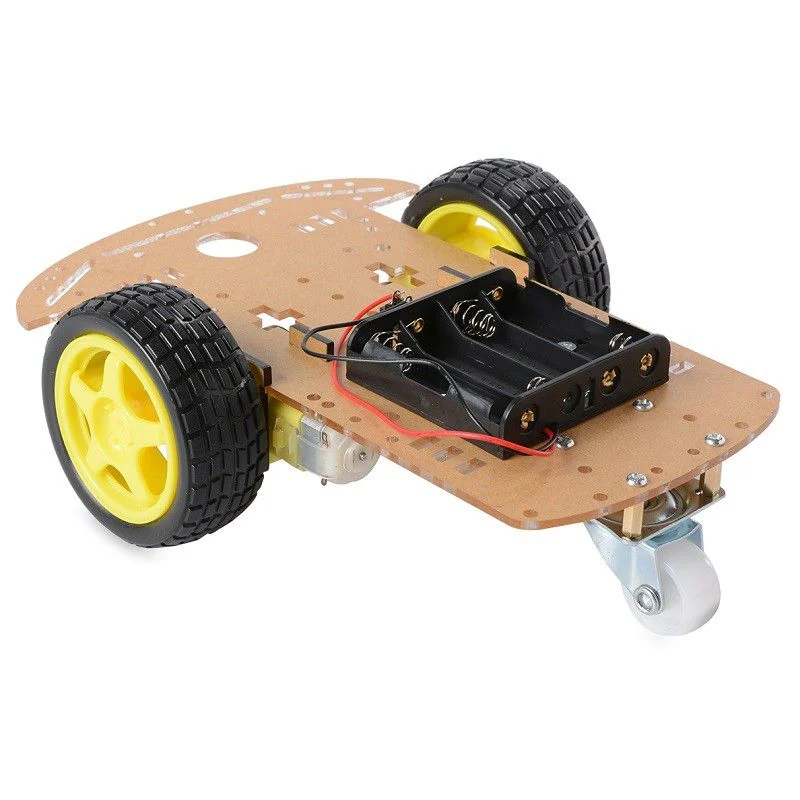
2WD Robot Car Chassis Kit
৳650
- Fresh, latest-batch stock — never old shelf stock
- Tested before it ships
- Arrives dead? We replace it
- Same-day delivery in Dhaka · Cash on Delivery nationwide
- See it before you buy: visit our shop at Ansar Ali Sarak, Boat Ghat, East Nurer Chala, Vatara
The 2WD robot car chassis kit is the mechanical base of a two-wheel drive smart car: a pre-cut acrylic deck of roughly 200 x 140 mm, two TT gear motors with 65 mm rubber wheels, a front caster ball, and all the screws, nuts and standoffs needed to bolt it together. Add an Arduino or ESP32, an L298N driver and a battery pack, and you have a line follower, an obstacle avoider or a Bluetooth RC car.
- Pre-cut acrylic plate, approx 3 mm thick, with holes laid out for boards and sensors
- 2 x TT DC gear motors, 3-6 V, approx 1:48 reduction, 100-200 RPM no-load at 6 V
- 2 x 65 mm rubber-tyre wheels plus a swivel ball caster for three-point balance
- Motor brackets, screws, nuts and standoffs included; a screwdriver is the only tool needed
Differential drive keeps the first build simple and still leaves room for encoders later, when a project outgrows open-loop driving. It is the platform most school and university robotics teams in Bangladesh start from.
Not sure it will work? Test your circuit free in Tekko Sim — on your phone, in Bangla or English.
Drive Type: 2-wheel differential drive with front caster
Chassis Material: pre-cut acrylic sheet, approx 3mm thick
Chassis Size: approx 200 x 140mm working platform
Motors: 2 x TT DC gear motor, 3-6V operating range
Gear Ratio: approx 1:48 reduction per drive motor
Wheels: 2 x 65mm diameter rubber tyres with plastic hubs
Caster: 1 x swivel ball caster for the front support
Motor Speed: approx 100-200 RPM no-load at 6V
Current Draw: approx 100-200mA per motor free-run, higher on stall
Load Capacity: carries a controller board, driver, battery pack and sensors
Included Hardware: screws, nuts, standoffs, motor brackets
Assembly: screwdriver only, no drilling or cutting required
Typical Builds: line follower, obstacle avoidance car, Bluetooth RC car
| Category | IoT Kits |
| Model no. | CH-2WD-KIT |
| Availability | In stock |
| In stock | 37 pcs |
| Delivery | Cash on Delivery, nationwide Bangladesh |
Customer reviews
No reviews yet — be the first.
Questions about the 2WD Robot Car Chassis Kit
What comes with the 2WD robot car chassis kit?
You receive the acrylic chassis plate, two TT DC gear motors, two tyred wheels, a caster ball, plus the screws, nuts, standoffs and brackets to assemble a rolling platform.
How do I drive the motors from an Arduino?
Wire each TT motor to an L298N or similar dual-channel driver, feed that driver from a 6-12V source, and control speed and direction through two PWM pins per motor.
What battery setup suits it best?
A 4-cell AA holder at 6V runs the motors directly, while a 2S or 3S 18650 pack feeding a driver that tolerates the voltage gives longer run time for competition practice.
Do I need to solder anything to build the chassis?
The mechanical assembly is screws only; soldering appears later when you attach wires to the motor terminals or extend sensor leads.
Is it suitable for a first robotics project?
Yes — differential drive with two motors is the simplest platform to program, and a line-following demo can be running the same day the kit is unboxed.
How is 2WD different from a 4WD chassis?
Two driven wheels with a caster turn more easily and cost less, while 4WD doubles traction and climbing ability at the price of extra motors, current draw and driver channels.
One wheel spins slower or the car veers — how do I fix it?
Check the wheel hub is seated fully on the motor shaft, confirm both motors receive the same PWM value, and trim one side's speed in code since budget TT motors differ slightly.
2WD Robot Car Chassis Kit এর দাম কত?
সর্বশেষ দাম Tekko প্রোডাক্ট পেজে দেখুন — কিটের আপডেটেড প্রাইস ওখানেই থাকে।
এই রোবট কার কিট কোথায় পাবো?
Tekko অনলাইন স্টোরে স্টকে আছে, সারা বাংলাদেশে হোম ডেলিভারিতে পাঠিয়ে দেওয়া হয়।
লাইন ফলোয়ার রোবট বানাতে কেনো করবো এই কিট?
চেসিস, দুইটা গিয়ার মোটর, চাকা আর ক্যাস্টার একসাথে পাওয়া যায় বলে শুধু ড্রাইভার আর সেন্সর জুড়লেই রোবট দৌড়ানোর জন্য রেডি হয়ে যায়।
মোটর কিভাবে লাগাবো?
মোটর ব্র্যাকেটে TT মোটর বসিয়ে স্ক্রু টাইট করুন, চাকা শ্যাফটে চাপ দিয়ে বসান, তারপর মোটরের দুই তার L298N ড্রাইভারের আউটপুট টার্মিনালে যুক্ত করুন।
নতুন শিক্ষার্থীরা কোন প্রোজেক্ট দিয়ে শুরু করা ভালো?
লাইন ফলোয়ার দিয়ে শুরু করা সবচেয়ে সহজ — এরপর অবস্টাকল অ্যাভয়ডেন্স বা Bluetooth কন্ট্রোল কারে সেন্সর আর কোডের চ্যালেঞ্জ ধীরে ধীরে বাড়ানো যায়।
More in IoT Kits
All iot kits →