Soil Moisture Sensor Project: Automatic Plant Watering
Use a soil moisture sensor, a relay and a small pump to water a plant on its own. Full Arduino build: wiring, calibration, code and common faults.
Go away for a week and the plants on the balcony suffer. A soil moisture sensor is a cheap fix. Push it into the soil and it tells you whether the soil is wet or dry. An Arduino reads that number, switches a relay on, a small pump runs for a few seconds, and then it stops.
The logic is three steps. The sensor reports the soil's wetness as a number. When the number crosses the "dry" line, the Arduino turns the relay on. The relay completes the pump's power path, water flows, then it switches off again.
What you need
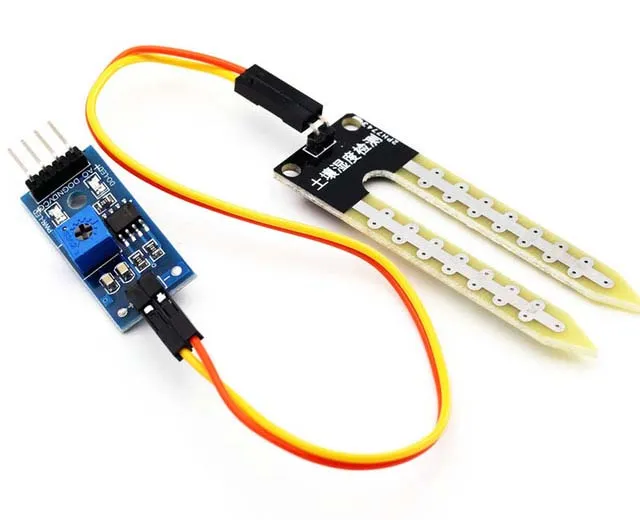
- Soil moisture sensor module (with probes)
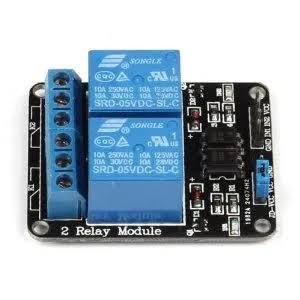
- 1-channel relay module (5V)
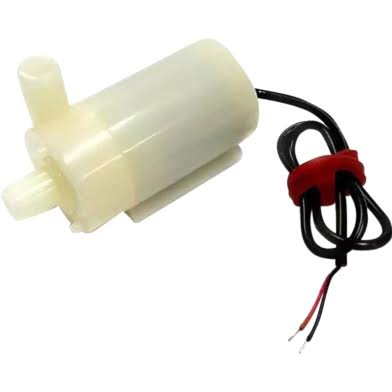
- 5V mini submersible water pump + tubing
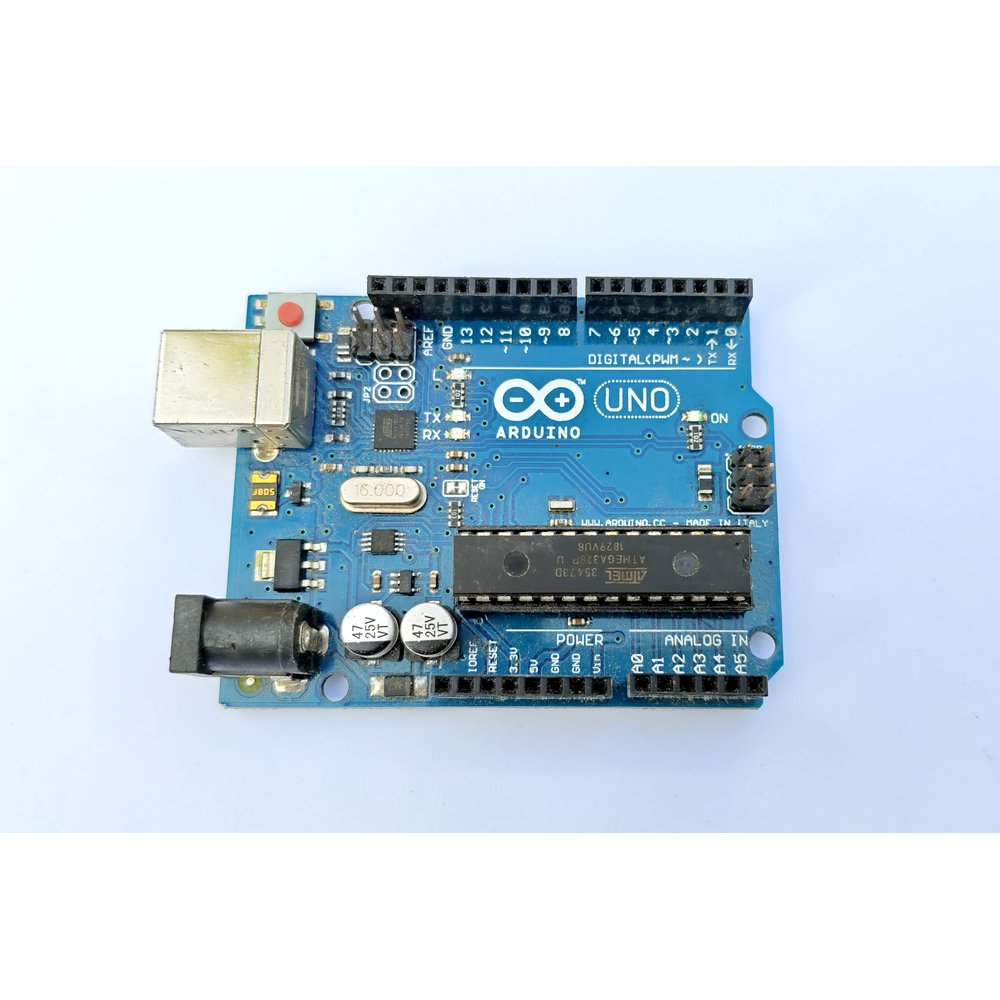
- Arduino Uno R3
- Jumper wires (male–female and male–male)
- A separate 5V supply for the pump, and a bucket of water
Warning
motors, pumps and water: keep water and electronics apart. The pump part that sits in water — never handle its wires wet, and keep the water container at least a hand's width from the board; one spill can end it. Switch off and unplug before touching the pump or moving parts. A spinning shaft, gear or fan blade looks harmless — tie long hair back, keep loose sleeves and strings away, and stop the power before reaching in. A jammed motor heats up; if it stalls, stop within a minute. Sit the pump firmly on the tank floor and never run it dry — an empty pump dies fast. Younger builders work with an adult.
Prices can change; check Tekko for the latest.
How a soil moisture sensor works
The sensor: two metal probes in the soil, and the soil between them acts as a resistor. Wet soil conducts easily, dry soil poorly. The module's analog output turns that difference into a number your code reads.
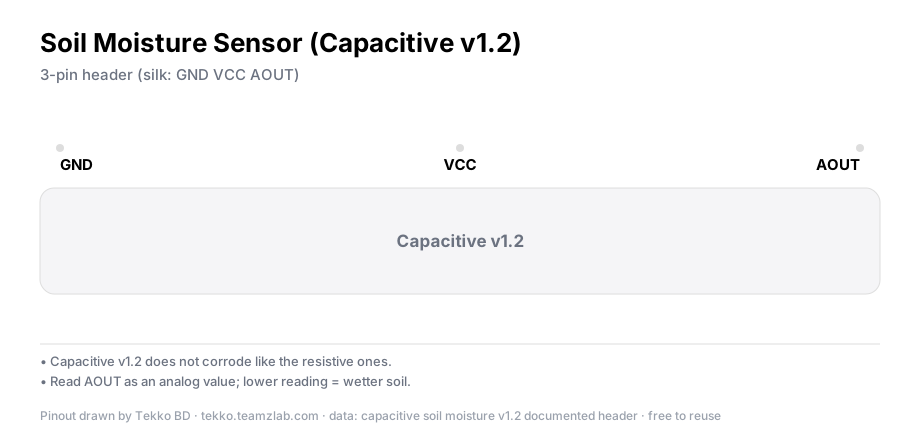
The relay: an electrically operated switch. A small 5V signal from the Arduino pulls the coil, which closes the switch in the pump's higher-current path. The pump current never goes through the Arduino. That is the whole reason for the relay.
Warning
relay modules: in beginner projects switch only low-voltage loads — a 12 V motor, lamp, fan or pump. Never wire household 220 V mains into a relay circuit; a mains mistake means dangerous shock and fire, and no breadboard project makes that safe. Mains work is for experienced adults, done to code. Keep the two sides apart: the input side takes the board's 5 V and a signal pin, the load side takes your battery or adapter — never mix them. For inductive loads like motors and pumps, check the flyback diode or the module's built-in protection is in place. Unplug the load wiring when finished, and let the relay cool before touching it.
Specification
| Part | Key facts |
|---|---|
| Soil moisture sensor | 3.3–5V · analog (A0) + digital (D0) output · LM393 comparator |
| 1-channel relay | 5V coil · 10A contacts · IN pin signal · most boards are active LOW |
| 5V submersible pump | 3–6V DC · ≈100–200 mA · lifts water ≈0.5 m |
Wiring
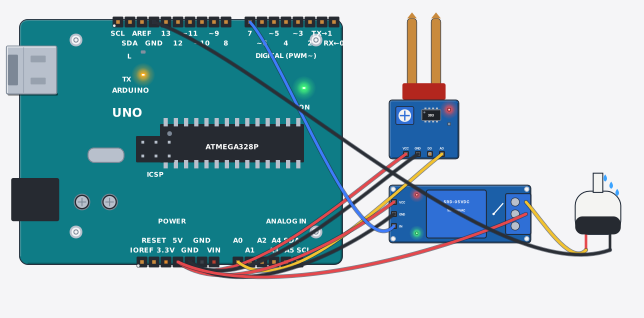
Sensor: VCC → 5V, GND → GND, A0 → A0. Leave D0 unconnected, since we read the analog pin.
Relay: VCC → 5V, GND → GND, IN → digital pin 7.
Pump: one wire → relay COM, relay NO → adapter +. The other pump wire → adapter −. With the relay off, the pump path stays open.

Want to see the wiring first? The same circuit runs free in Tekko Sim.
Note
NO means Normally Open: no signal, no path. Always use NO for a pump. If the Arduino dies, the pump stops too.
Find your threshold
Every sensor reads a little differently, so take two readings first:
void setup() { Serial.begin(9600); }
void loop() {
  Serial.println(analogRead(A0));
  delay(500);
}
Note the reading with the probes in open air (e.g. ~850), then pushed into wet soil (e.g. ~420). Your THRESHOLD sits between the two. Put it in the code below.
Full code
const int SENSOR = A0;
const int RELAY  = 7;
const int THRESHOLD = 620;   // your measured value
const int PUMP_MS   = 3000;  // pump run time in ms

void setup() {
  pinMode(RELAY, OUTPUT);
  digitalWrite(RELAY, HIGH);   // HIGH = off on most boards
  Serial.begin(9600);
}

void loop() {
  int value = analogRead(SENSOR);
  Serial.println(value);

  if (value > THRESHOLD) {          // dry = higher number
    digitalWrite(RELAY, LOW);       // LOW = relay on (common)
    delay(PUMP_MS);
    digitalWrite(RELAY, HIGH);
    delay(5000);                    // let water spread
  }
  delay(2000);
}
Verify it works
Push the probes into a dry pot. Once the reading crosses THRESHOLD the relay clicks, the pump lifts water for PUMP_MS, then stops. Water the pot and the reading drops, and the pump stays quiet.
Common problems
- The relay is backwards (always on) — your board may be active HIGH. Swap LOW and HIGH in the code. Test: with the IN pin floating, the relay should stay silent.
- The reading never changes — dirty probes, or not pushed in deep enough. Insert to the marked line and wipe the probes.
- The pump hums but lifts nothing — not fully submerged, or air trapped in the tube. Submerge it and pull the tube gently.
- It reads "wet" all the time after a few days — the probes have corroded. This kind of analog probe passes current constantly, so the metal wears away. A capacitive sensor is the alternative.
FAQ
How often will the pump run? It depends on how fast the pot dries, and the code runs the pump only when the sensor says dry. Keep PUMP_MS short (2–4 s). Small, frequent watering beats one long soak.
Can the pump run straight from the Arduino's 5V? No. The pump draws more current than the board can supply. That is what the relay and the separate adapter are for.
Will the code run on an ESP32? Yes, but analogRead returns 0–4095 there, so measure your THRESHOLD again. Also check that the relay module accepts a 3.3V signal.
More from Tekko
- Kits category — the Automatic Plant Watering Kit bundles these parts
- Sensors category
- Run it free first: plant watering in Tekko Sim
Sources
- Arduino
analogRead()reference — arduino.cc
Want it as one kit?
Automatic Plant Watering System Kit — A soil moisture sensor tells the Arduino when the soil is dry, and the Arduino switches a small water pump on through a relay until the plant has enough.
See the kitTry it free before you buy
This project runs free in Tekko Sim, right in your browser — before you spend a taka.
Automatic Plant Watering System using Arduino — Run in Sim